
In 2023 the Clean Energy Council suspended 166 accreditations and cancelled 51. Most of the cases opened came from the Clean Energy Regulator’s inspections program [1] which focuses on quality and compliance of installations across the country. GSES has been part of the Clean Energy Regulator’s inspection program for many years and has seen all sorts of good, bad and ugly systems. This article will explore the most common issues found during our inspections and how to improve installations so that installers can rest easy knowing that they won’t have compliance issues but also that their customers are happy and safe.
Roofing Penetrations
Where the PV array cable and conduit passes through a tile or steel roof, a fit for purpose collar flashing, such as dektite should be installed.
Improper Roofing Penetrations
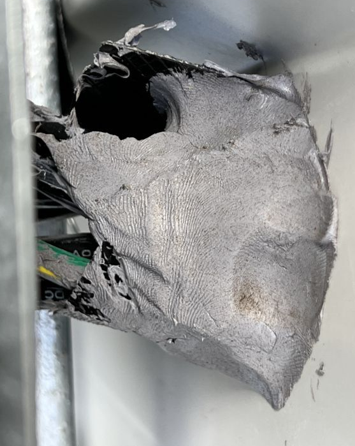
In this instance below, we can see that the cabling is passing through a tin roof, however no dektite or flashing is installed. This improper installation could lead to water ingress into components, and can cause severe damage to the system and surrounding components. To correct this, the installer must reinstall using a dektite (or similar) and a UV stabilised sealant. Adding additional silicone to the penetration will ensure that it provides a waterproof seal. The installer should also install a suitable cable gland on the end of the conduit leading to the roof penetration to avoid this issue.
Correct Roofing Penetrations
The below image illustrates the correct utilisation of dektites and flashing for roof penetrations in a rooftop PV system. The system is fully sealed against water ingress, ensuring the longevity of the system.
Earthing Lugs and WEEBs
Proper design and installation of the earthing system is crucial to the system’s operation. Earth faults can pose several risks to the system and to people around it including: electric shock, fire hazard, damage of other components, and voltage drops that lead to reduce performance.
Earthing lugs and WEEBs must be used to connect the equipment to the earth. It is also important to use an anti-corrosion spray on the lug to avoid it corroding.
Improper Earthing
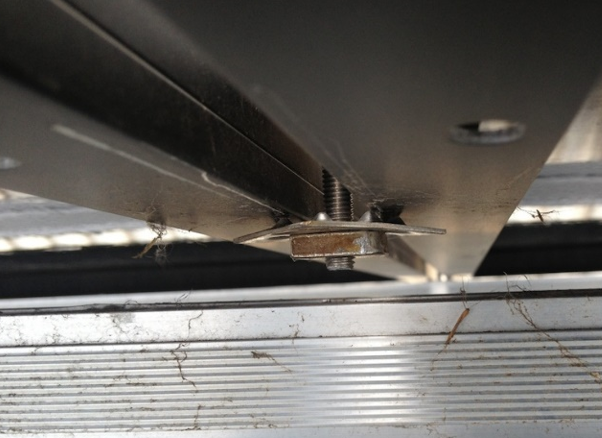
In the image below right, a WEEB is not correctly installed which risks the grounding of relevant panels. The WEEB should be attached firmly on the panel to ensure that it bears the electrical current.
The image below left, an earthing lug is sprayed, but it is in contact with the panel surface itself. This could potentially cause a short circuit and even hotspots to appear on the panel, severely damaging the system and harming performance.
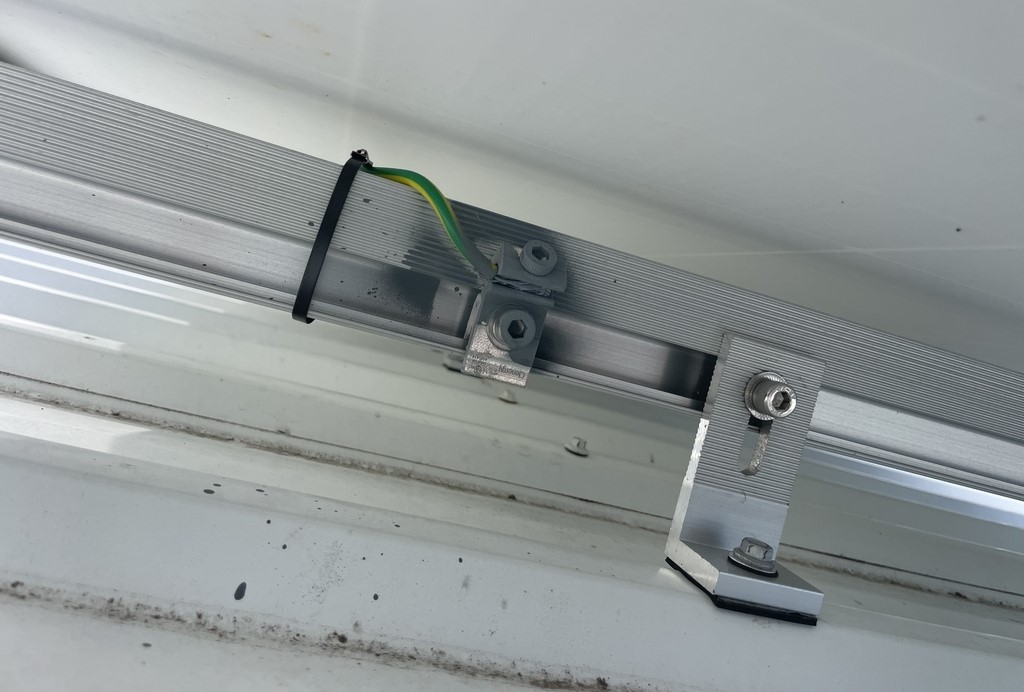
Proper Earthing
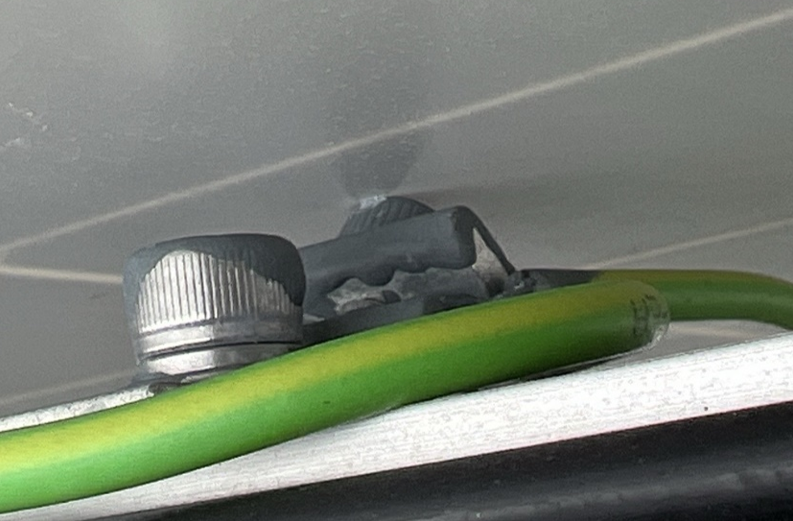
A well-earthed system has every module earthed. Importantly, removing a module won’t compromise the earthing of any other module. All lugs and WEEBs should be installed as per manufacturer specifications and should be protected from moisture using anti-corrosion coating.
We recommend using earthing (WEEB) washers with all mid clamps to ensure that none are missed. It is also important to be careful when laying the modules as the metal frame can scratch the WEEB washer and make it less efficient when conducting currents.
Cabling and Connectors
Improper cabling terminations and connectors are a common point of failure for PV systems. Cabling should be installed with sufficient conduit protection, and appropriate glands. A multi-hole gland shouldn’t be used for a single cable if it means leaving a hole exposed.
The connectors between the panels must always be of the same make and model to ensure a perfect fit. Connectors that do not match have a high risk of coming apart, possibly leading to dust and water ingress, which can cause faults on the system and arcs to form.
Improper Cabling
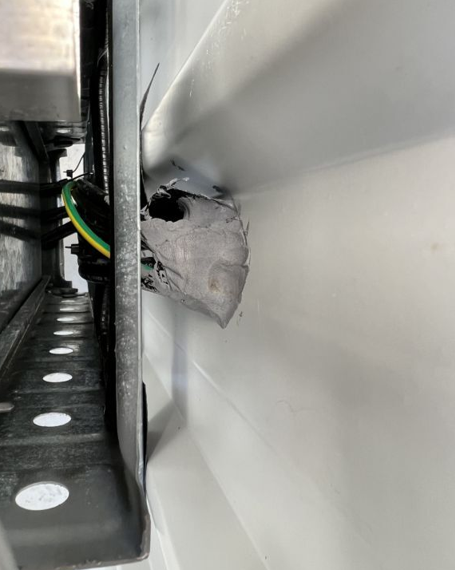
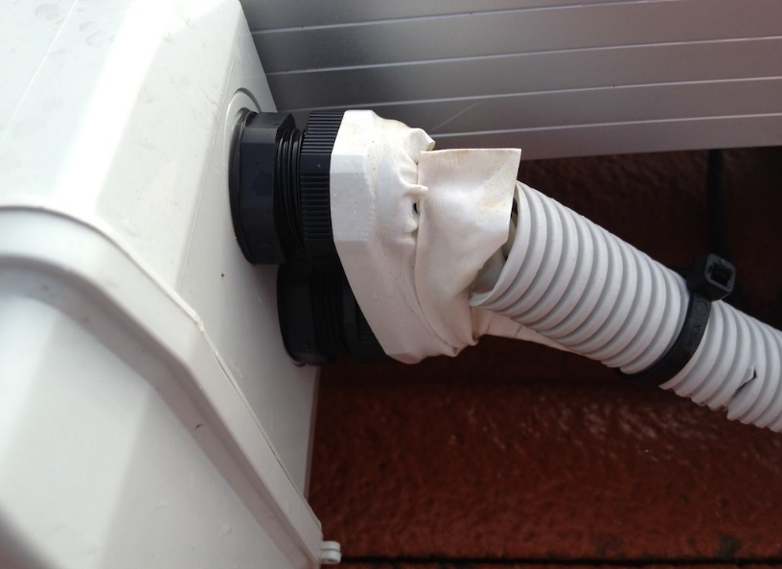
The image below demonstrates an improper connection between a conduit and a gland, leaving the potential for water ingress into the conduit. Even with an appropriate drain at the lowest point in the conduit the exposed cabling poses a risk.
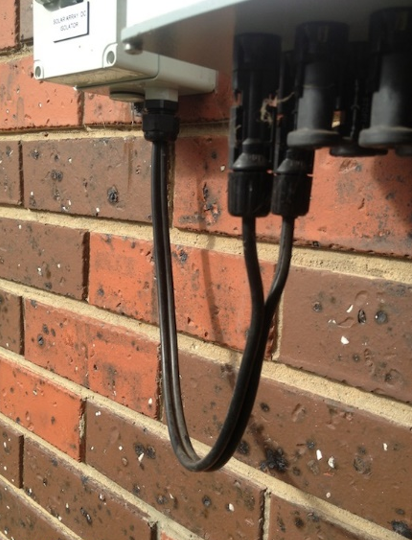
This image has no conduit at all, leaving the cabling itself hanging loose and exposed to the elements.
Proper Cabling
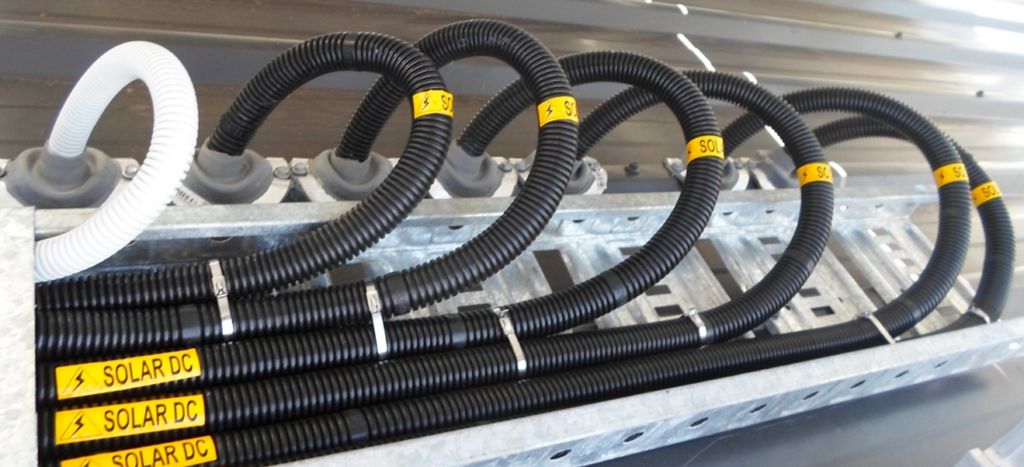
A good cabling will be organised, sealed, labelled and well-terminated. Some good practices include ensuring that:
- The conduit is labelled every couple of meters
- Drains are installed at the lowest point of conduits, and their lowest point isn’t the switchboard or any sort of conductor termination
- Module cabling on the roof isn’t loose and isn’t resting on the roof surface
- New holes haven’t been drilled into enclosures, even the bottom. This is a common mistake that compromises the weather resistance of an enclosure
- There aren’t more cables run through the gland than holes provided in the gland, and spare holes are sealed with a manufacturer-provided plug
Isolators
Isolators should be installed in accordance with the relevant manufacturer guidelines, their relevant ratings and in accordance with AS/NZS 5033:2021.
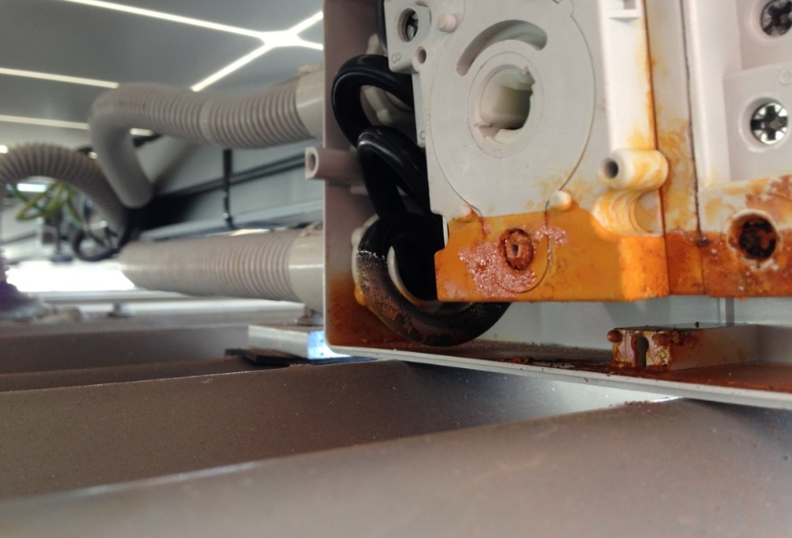
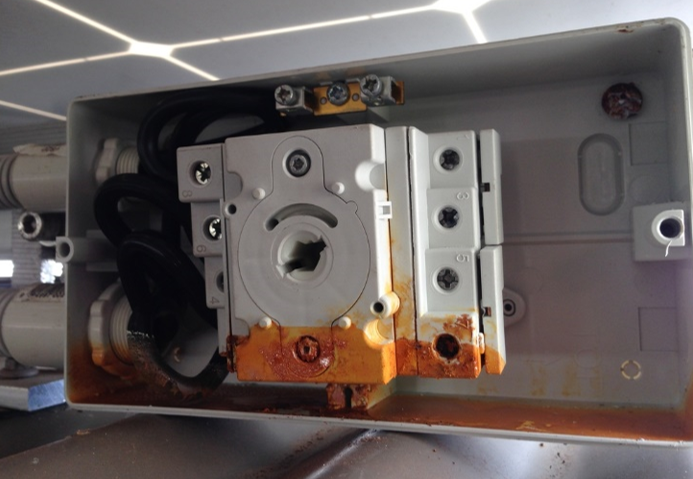
Improper Isolator Installation
Failure to do so can result in water ingress, even if the isolator is located under the panel like in the image below. Water ingress could lead to failure of the components, and in worse cases cause fires that can damage the entire system. Installers should also check the seals between the isolator and conduit – the isolator entry shouldn’t be the lowest point of the conduit as this could result in water ingress. The isolator should also be properly resealed after removing the cover when installing the system.
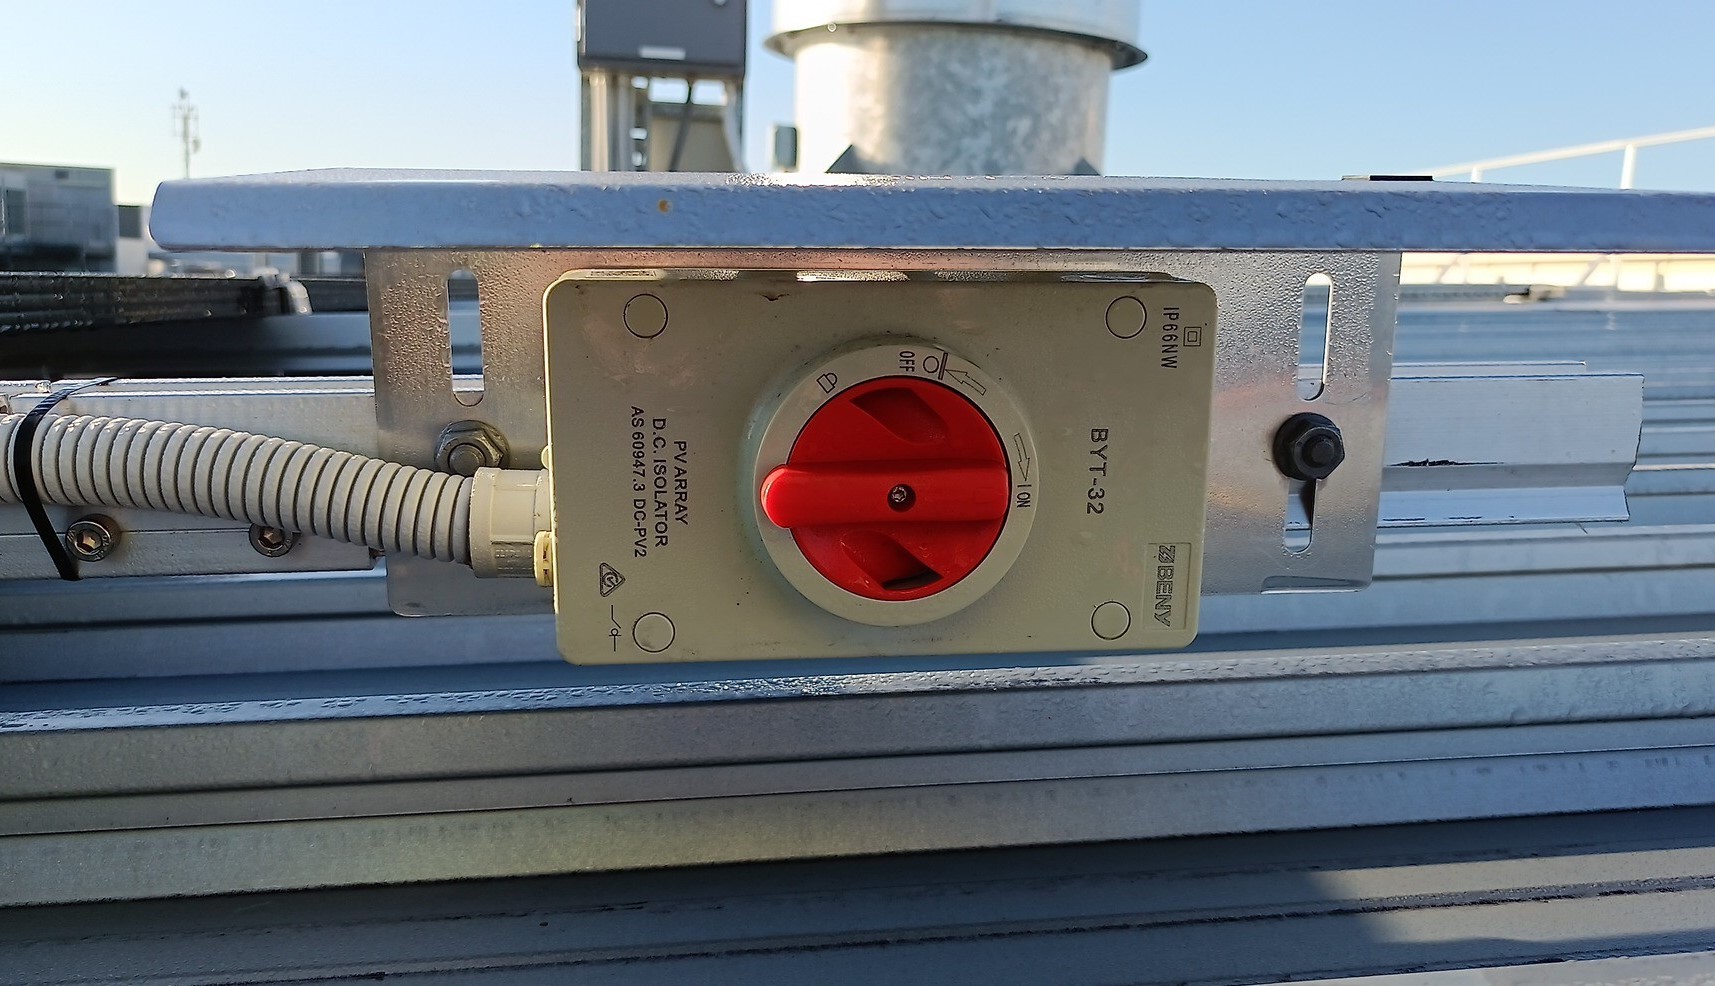
Proper Isolator Installation
A good (and compliant!) isolator installation is in the shade (often beneath panels, but a cover as described in AS/NZS 5033 is also acceptable) with precautions taken to prevent weather ingress. It needs to be easily accessible and well labelled. The below is an example of a correctly installed isolator.
Signage
It’s easy to think signage isn’t necessary, but it’s very important not just for residents, but also for the next tradespeople at site and emergency services. A PV reflector clearly signals the presence of a system to isolate if necessary, and a DC cabling warning placed as required by relevant standards could prevent a bad accident for anyone working in the roof space.
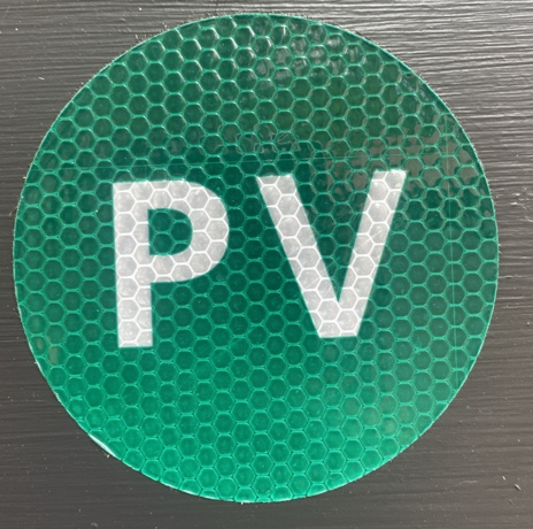
Improper Signage
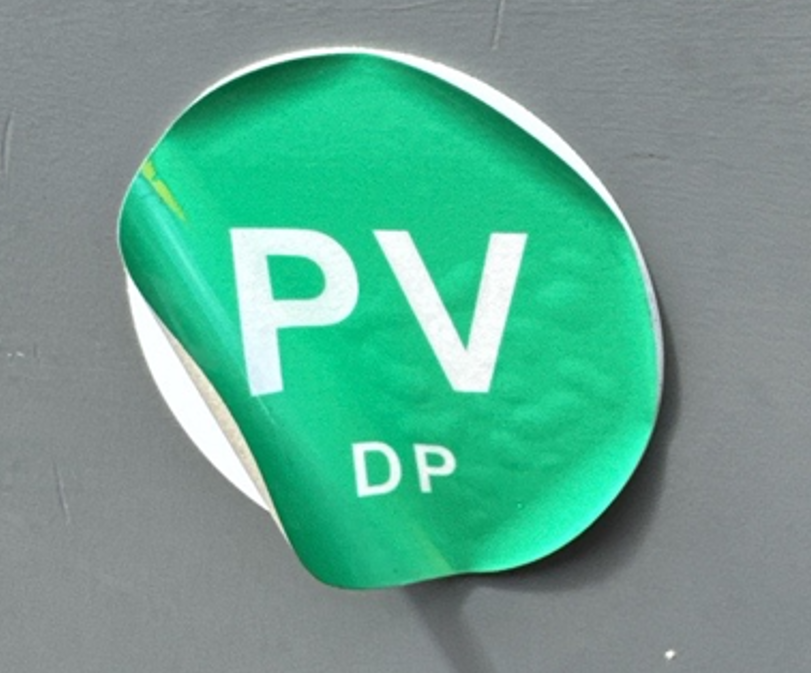
The 70mm green PV reflectors commonly sold do not meet the requirements set out in AS/NZS 5033:2021 5.4. The below left reflector is missing an indicator of isolation method (e.g. “DP”). The reflector on the right cannot be expected to last the lifetime of the system, and would require a replacement from the installer very quickly.
Proper Signage
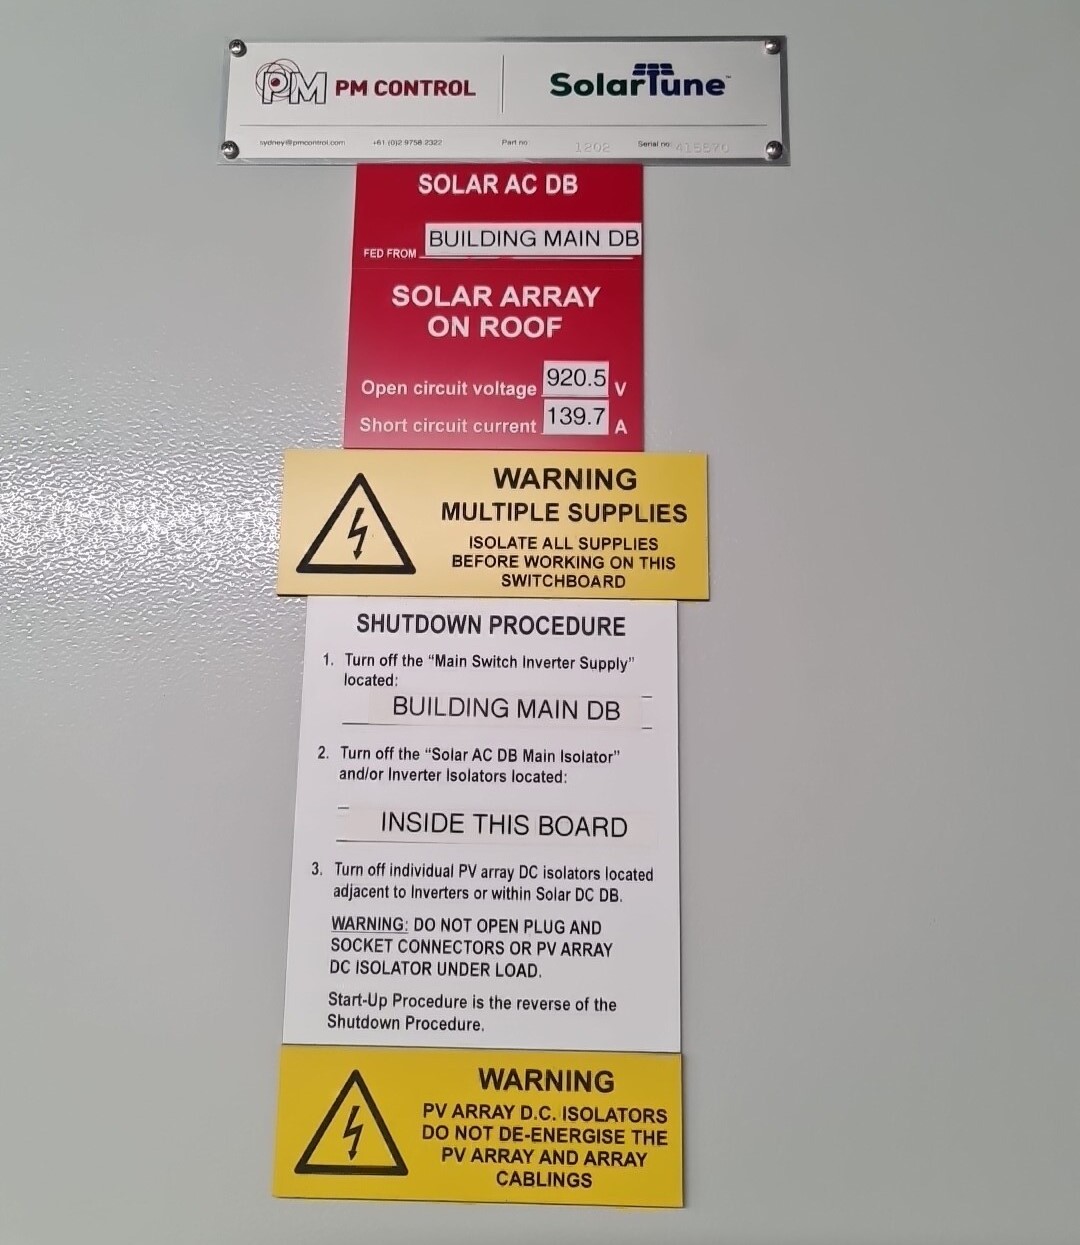
There’s a lot of signage that’s required in Australia, and it can broadly be found in the up-to-date editions of AS/NZS 5033, AS/NZS 4777 and AS/NZS 3000. It’s also a very common area where installers are pulled up. Whether it’s the neutral wire being unlabelled in the switchboard, disconnection point indicators being in the wrong place or the site plan missing key information such as the address, there’s a lot to keep track of. However, an exemplar system will have all signage necessary which will ensure any future work on or nearby the system is as safe as possible. The below picture is an example of good signage.
Inverter Installation Location
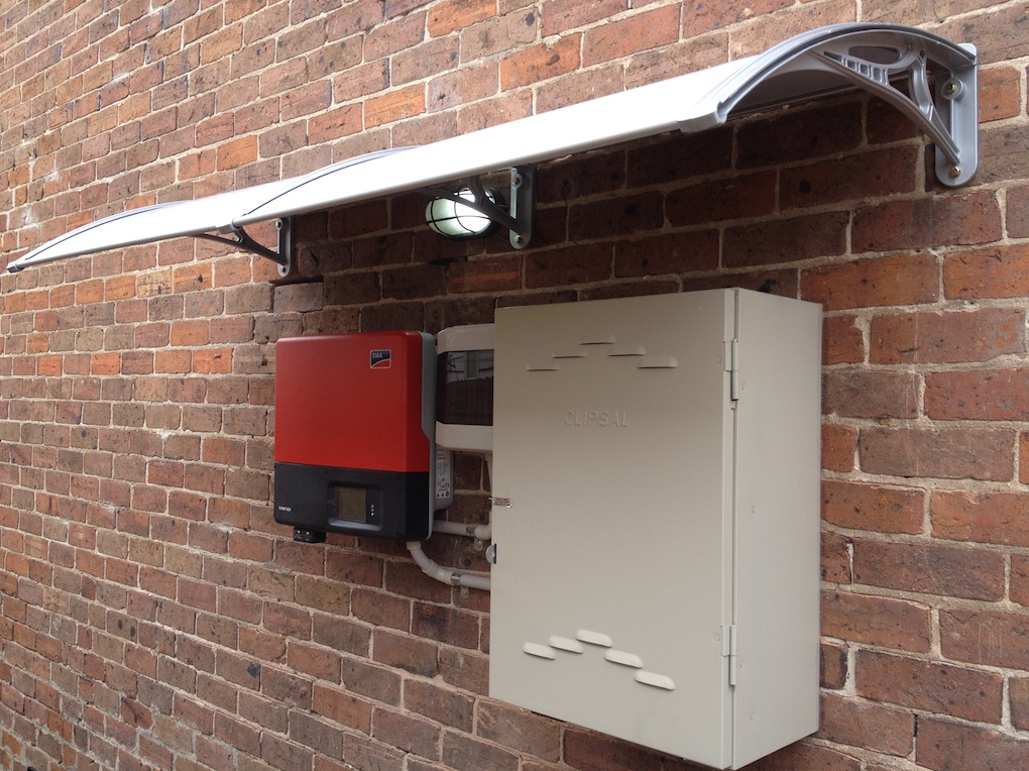
The inverter should be installed in an appropriate location for its IP rating and should not be exposed to direct sunlight for the majority of the day. Installation in a spot exposed to direct sunlight would result in a faster degradation of the inverter to the point where water resistance could be compromised or maintenance can’t be performed without damaging the enclosure. The inverter should be installed in a well-ventilated area, away from direct sunlight as indicated in the picture below.
Conclusion
When shortcuts are taken in solar installation, things can get ugly quickly. Whether this is just needing to replace a component or widespread ceiling damage from an improperly sealed roof, avoidable repairs and replacements are costly and compromise the efficiency and longevity of systems. Repeated issues with installations can also risk the loss of accreditation, so being rigorous on your installation practices is critical, saving you time, money and reputation in the long run.